 by
by -
It’s hard to take a great photo of a total solar eclipse, so I asked a NatGeo photographer for help.
-
Babak Tafreshi has been photographing solar eclipses for 30 years. They can be seen on all seven continents.
-
For him, the most challenging part is to control his own excitement enough to get a clear shot.
Total solar eclipses are not something you see every day. Monday’s eclipse was the last we will see in the US for another 20 years.
When they happen, it’s natural to want to document them. But getting the perfect shot is challenging. And if you don’t take the proper precautions, you can damage your eyes and your camera.
I knew I wanted to take a great eclipse photo, but I had no idea what I was doing. I needed professional guidance. So, I contacted Babak Tafreshi, a National Geographic photographer who has been capturing eclipse shots for 30 years.
With Tafreshi’s advice, I was able to take over 50 photos of the eclipse using both my iPhone and my DSLR. Here are the four tips he gave me that made these photos possible.
Protect yourself and your gear during the eclipse
Make sure you protect your lenses. This is about your eyes and your camera. If you are not in the window of totality, you need to make sure you are protecting yourself and your equipment from the harsh rays of the sun.
It is never safe to look directly at the sun without proper eye protection. Before and after totality, you must wear eclipse glasses to view the eclipse safely.
Direct light is not good for your camera or smartphone either. When UV radiation streams directly into your camera lens, it can cause damage.
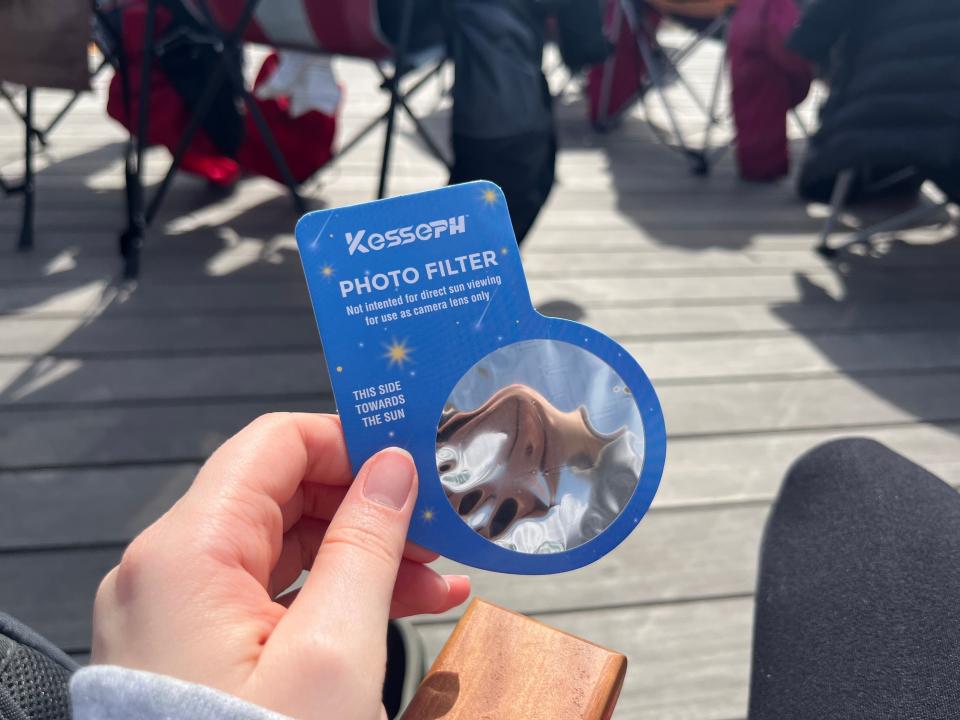
To protect your equipment when photographing the partial eclipse, you need to use an ND filter for at least 10 stops, preferably 16 stops, Tafreshi said. ND filters are like sunglasses for your camera; they reduce the intensity of light entering your lens. You can also buy a solar filter for your smartphone.
I didn’t buy an ND filter for my DSLR ahead of time, so I only used that camera to photograph totality – when it was safe to photograph the eclipse without one.
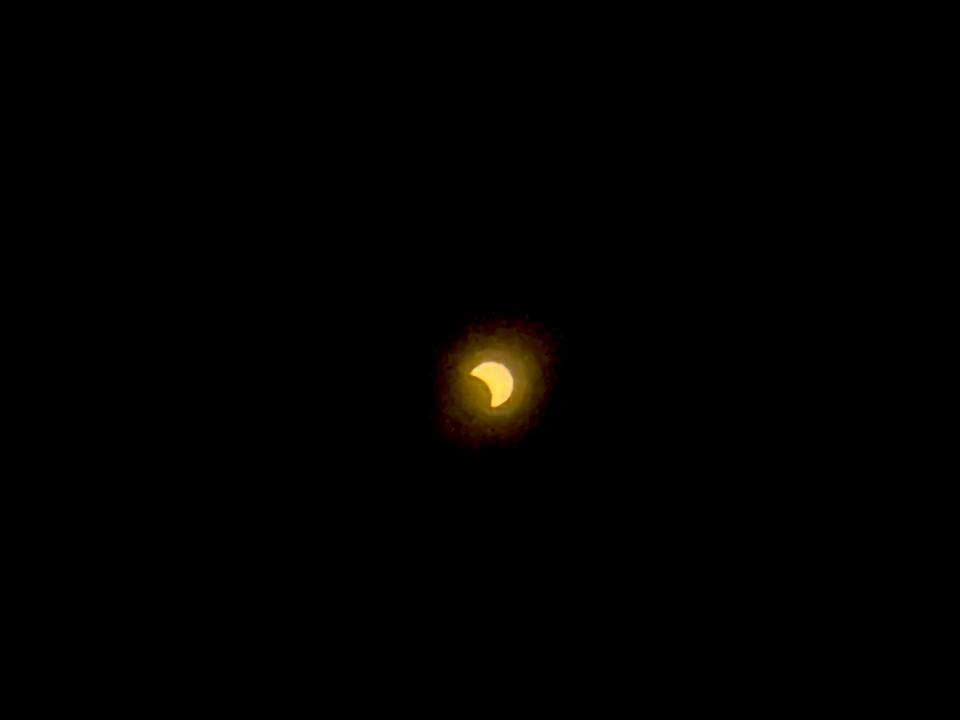
For photos of the partial eclipse, I used my iPhone camera, which I protected with a spare pair of eclipse glasses. I just held the lens of the glasses over my iPhone camera lens, et viola!
Keep calm and use a tripod
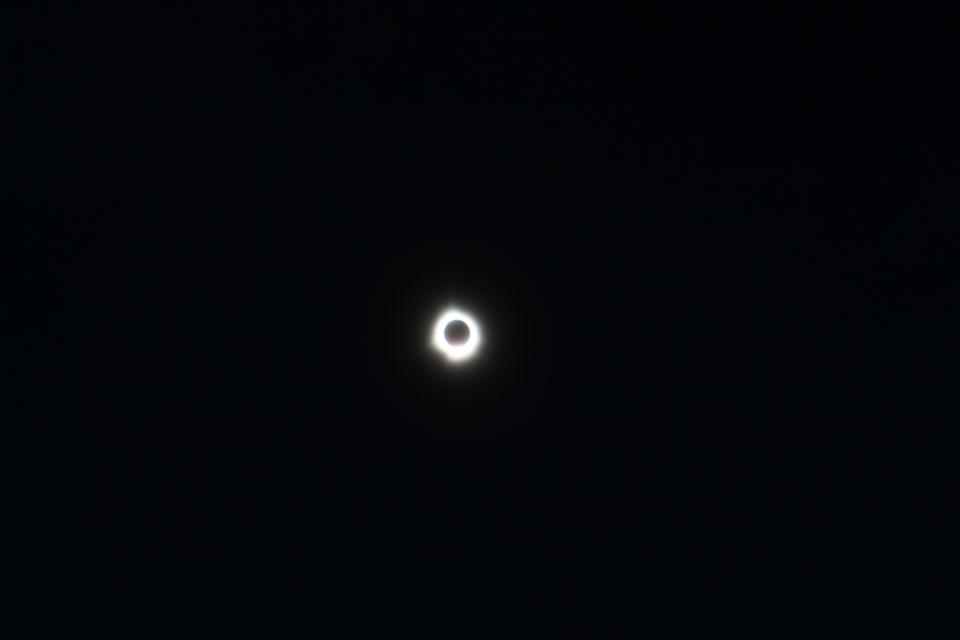
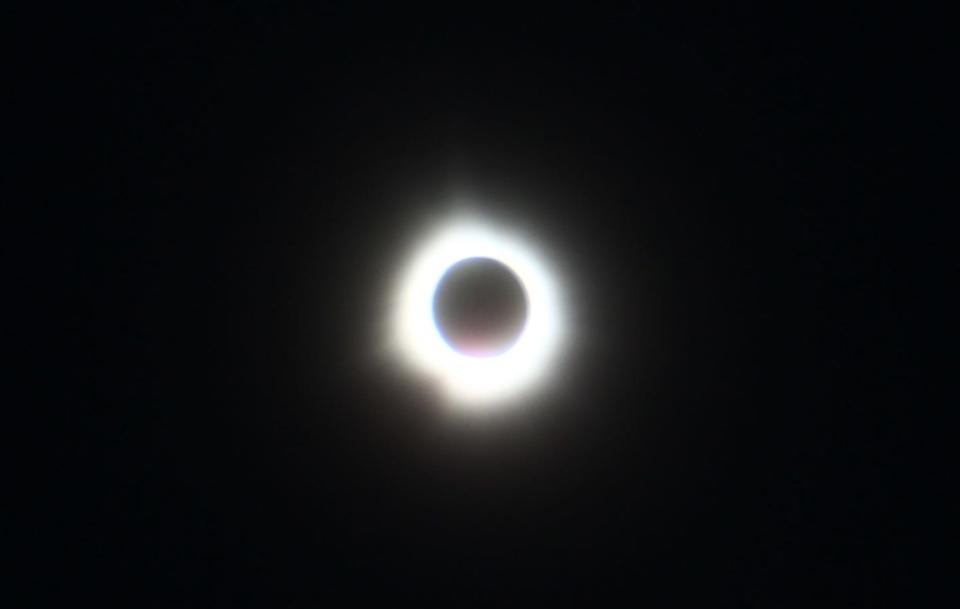
Solar eclipses are exciting, especially during totality when the moon’s shadow completely blocks out the sun and plunges you into darkness.
For some, the whole thing is a visceral experience. Your physical reaction to the sudden change in light and temperature can make it difficult to hold a camera steady and focus on getting the right shot, Tafreshi said in an emailed statement.
“The most challenging aspect [of eclipse photography] definitely how to control your senses,” he wrote.
And he was right. When the total came into effect, I was overwhelmed by the drop in light and temperature, a beautiful view of the sun’s corona, and the sunset-like colors on the horizon. It took me a moment to catch my breath and refocus on the task at hand.
Any shake or vibration on your camera will ruin your eclipse shot, explained Tafreshi. This is especially important to remember during fullness when using higher exposures. If you’re expecting shaky hands during the experience, it’s best to use a tripod.
I used a 50-inch tripod to steady my camera while taking full shots. It helped keep my camera stable, but I didn’t have a remote shutter release to prevent movement while taking photos. When you zoom in, you’ll see that all of my photos are a little blurry.
Use manual camera settings
Cell phone cameras worked fine during the eclipse, but those who used a regular old camera may have learned that it’s best not to rely on automatic settings, Tafreshi said, especially if using a DSLR. you use.
That’s because the sudden drop in light in the final moments before totality can confuse your camera’s sensor, Tafreshi said. Although totality does not lead to complete darkness, “The fall in light is so fast that we feel it is getting louder,” he said.
Your camera’s automatic settings cannot adapt to this rapid lighting change. Manual settings offer the dexterity you need to switch from photographing the partial to total eclipse.
For example, to capture the final moments before totality (when the diamond ring effect appears), you want to use a shutter speed of about 1/1,000 second. But as soon as the last rays of the sun disappear, you need to switch to a shutter speed of 0.5 to 1 second.
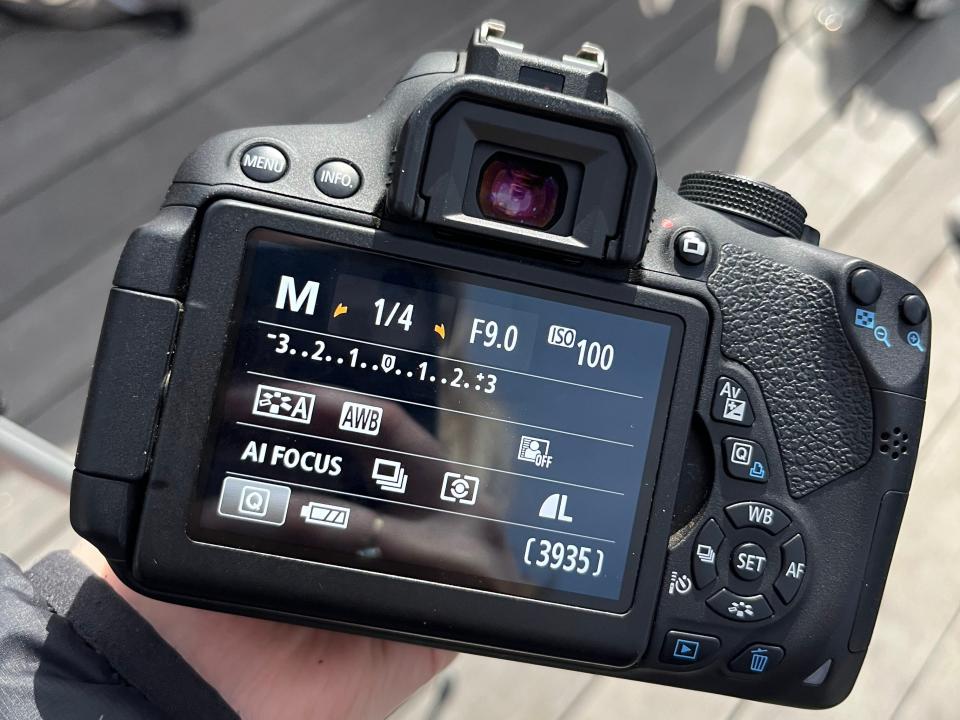
Shooting the whole thing with my DSLR, I set my ISO to 100, my aperture to f/9, and used exposure bracketing – a setting that allows you to take multiple photos over a range of exposures at one time. It helps ensure that you don’t end up with an overexposed or underexposed image.
Get creative
“The best photograph of the eclipse is not necessarily a clean, sharp, close-up of the image,” said Tafreshi. “That is what everyone is aiming for. Find your own signature and your creativity in this unique phenomenon.”
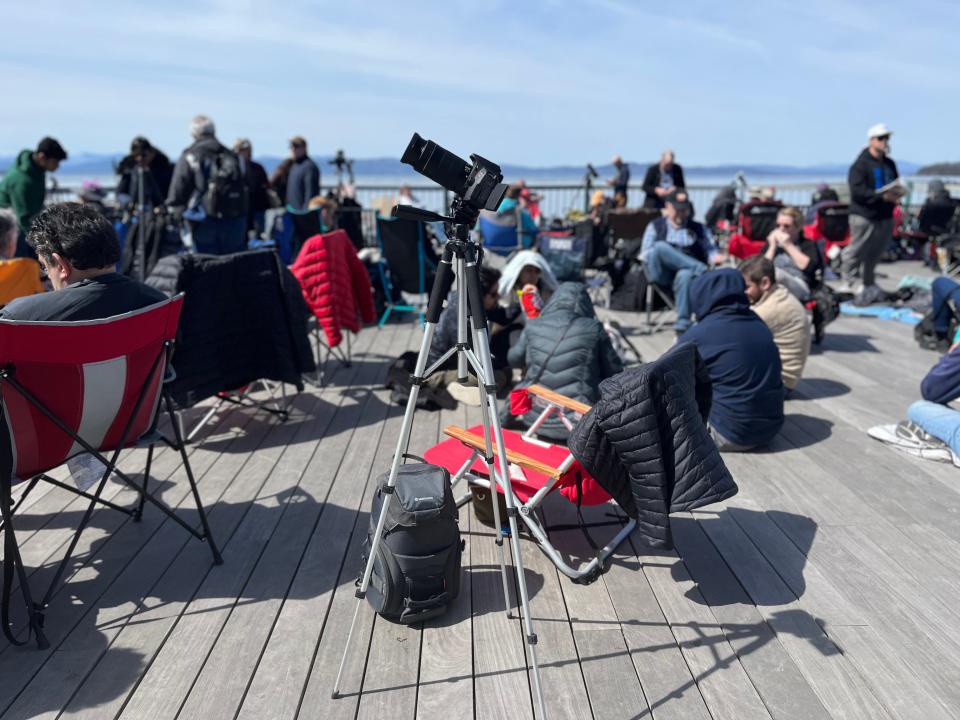
He suggested including interesting features in the foreground, such as other eclipse watchers and their reactions to the event, or a beautiful landscape in the background, such as mountains or water.
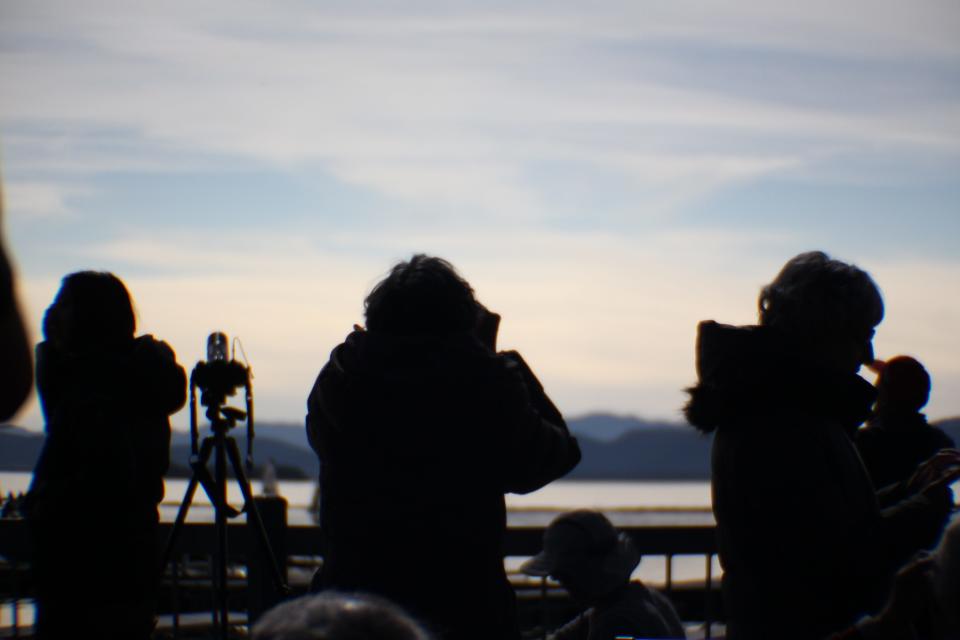
When I wasn’t shooting total, I tried to get some shots of the dusky sky and the silhouettes of the excited eclipse watchers.
Jumping between shooting the partial eclipse, totality, the sunset sky, and people definitely challenge my photography skills. But thanks to Tafreshi’s advice, I managed to get a fairly clear picture of the main event.
Read the original article on Business Insider